- Home
- Our Blog
Our Blog
Recent Posts
What Makes Laurel Crown’s Craftsmanship Different?
Posted by on
What makes Laurel Crown craftsmanship so unique? Every piece of our custom wood furniture is meticulously handcrafted by artisans trained in the tradition of antique reproduction. Our commitment to old-world methods, paired with the finest materials, results in heirloom-quality furniture that honors historical authenticity. Beyond woodwork, our exclusive upholstered living room collection invites you to personalize your space with customizable fabrics and finishes.
Antique Reproduction Furniture Built from the Finest Materials
We are uncompromising in our selection of premium-grade materials, making sure each piece of antique reproduction furniture reflects historical fidelity and structural integrity. Unlike mass-produced furniture that often relies on MDF (Medium-Density Fiberboard), polyresin, or automated assembly, we adhere to techniques refined over centuries.
Our handcrafted furniture offers distinguishing features, including:
- Solid Mahogany Construction: Unless otherwise specified, all of our pieces are carved from sustainably sourced, kiln-dried mahogany for longevity and rich, natural grain.
- Authentic Joinery: Traditional mortise and tenon joints reinforce all chair frames, far surpassing the structural limitations of dowel construction commonly found in modern alternatives.
- Dovetail Joinery for Drawers: All drawer assemblies utilize dovetail joints—renowned for their interlocking strength and superior craftsmanship—rather than nails or glue.
- Tabletop Reinforcements: Tongue-and-groove along with butterfly joints stabilize table surfaces, minimizing warping while preserving aesthetic integrity.
Skilled Artisanship in Every Detail
The label “handmade” is not applied lightly. For us, it signifies that each piece is built, carved, and finished entirely by hand, never by automated machinery. Our master woodworkers bring years of experience to every piece, ensuring exceptional detail and finishing precision.
Each handcrafted piece undergoes a detailed, multi-step finishing process:
- Three-Phase Sanding: Pieces are rough, medium, and fine sanded completely by hand to guarantee surface uniformity.
- Pore-Filling: Natural wood pores are sealed with filler for a flawless, even finish.
- Staining by Brush: A hand-applied stain enriches the wood grain, accentuating the inherent beauty of the mahogany.
- Multi-Layered Finishing: A minimum of three coats of clear satin lacquer are sprayed on, with light sanding between each coat to deliver a smooth finish and long-lasting water resistance.
Custom Upholstered Living Room Furniture
Our upholstered living room collection offers versatility without compromising on quality. Whether furnishing a sitting room, library, or formal parlor, you can personalize your piece with a selection of fabrics that reflect your taste. All cushion foams are fire-retardant and rigorously tested to meet BHFTI (California Bureau of Home Furnishings and Thermal Insulation) flammability standards.
We employ two historically inspired upholstering techniques:
- Slip Seat Cushions: Found in our Chippendale-style chairs, these removable seat cushions allow for easy cleaning or fabric replacement, making them both functional and stylish.
- Coil Spring Cushions: Used in most Victorian-era chairs and sofas, this method features traditional spring webbing beneath layered foam, providing enduring support and comfort. Double-corded edging completes the look, preserving historical design while enhancing structural resilience.
Experience the Lasting Beauty of True Craftsmanship with Laurel Crown
With each piece, we seek to uphold a standard of craftsmanship rooted in history and guided by precision. From our antique reproduction wood furniture to our custom-upholstered seating, every detail is a tribute to the enduring design and artisanal integrity found in Laurel Crown craftsmanship. View our selection of antique living room furniture in European/American styles today.
Father’s Day Furniture Gift Guide
Summer's arrival brings with it many familiar pleasures—crackling backyard barbecues, languid afternoons under the sun, the hum of baseball on the radio, and the comforting ritual of dozing on the front lawn. Yet among these seasonal delights, one occasion stands apart for its sentiment and significance: Father’s Day. Why Gift Furniture for Father’s Day? Too often, this [...]
The Decline of Fine Furniture Craftsmanship
The Industrial Revolution stands as one of the most transformative periods in human history. Stretching from the mid-18th to the early 19th century, this era ushered in sweeping changes across nearly every sector of society—industry, transportation, communication, and manufacturing. While its innovations advanced economies and improved accessibility to many goods, the effects on fine furniture [...]
The Proper Way to Sand Wood
Whether you are restoring a treasured heirloom or crafting a faithful antique reproduction, proper sanding technique is essential to achieving a refined and professional finish. And around here, we understand the importance of preserving the integrity and elegance of fine furniture. This guide will walk you through the fundamentals of how to sand wood properly—ensuring [...]
How to Tell If Your Wood Is Insect-Damaged
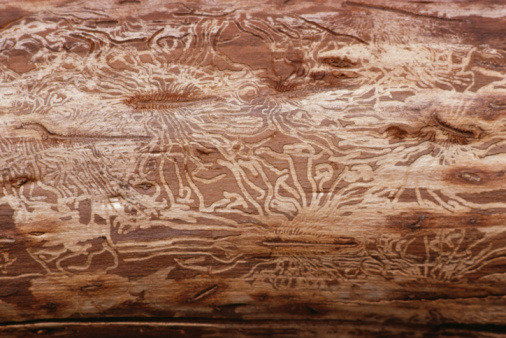
Solid wood furniture is more than a design choice—it is an investment in craftsmanship, longevity, and natural beauty. However, as enduring as hardwood may be, it is not impervious to the subtle, yet destructive forces of nature—specifically, wood-boring insects. Whether you own an antique reproduction or an original Victorian chair, safeguarding your furniture begins with knowledge. [...]
Advice for Antique Furniture Refinishing
Refinishing Your Antique Furniture – Everything You Need to Know In a perfect world, those who love antiques could inherit beautiful pieces of furniture in well-loved but cared-for condition. Things like dents, dings, scrapes, moisture damage, and insect damage would never happen, and the patina on our beloved family heirlooms would always be perfect. Unfortunately, the [...]
Which Mattress Size is Right For You?
Before purchasing a new bed make sure you know what size your current mattress is or what size you would like to have in the future. Below is a chart of the most common sizes for the United States, UK, and Asia. MATTRESS SIZES: CALIFORNIA KING: A mattress that measures 72 inches wide and 84 inches long. EASTERN [...]
How to Care for Solid Wood Furniture
Take the time to learn how to care for your solid wood furniture and it will last for generations. Our hand carved mahogany furniture is created by expert craftsmen, so you only need to do basic maintenance to keep it looking beautiful.Basic Care for Wood Furniture There are some basic precautions you can take to care [...]
The "Solid Wood" Test
If you don't know a lot about furniture construction, what types of joints to look for, what types of woods, or the pros and cons of different finishing techniques, try this simple "solid wood" test to quickly gauge quality: Ask the company what their furniture is made of: If they say that they build with solid hardwoods [...]
Know your Antique Styles: Victorian Furniture
Furniture fit for a Queen... Today's Victorian furniture originates from a period in time when the ever-beloved Queen Victoria reigned England. As one of the few queens in history to marry non-royalty from the middle class, Queen Victoria had a special place in the people's hearts which reflected culturally, all the way down to the style of [...]