Recent Posts
The Proper Way to Sand Wood
Posted by on
Whether you are restoring a treasured heirloom or crafting a faithful antique reproduction, proper sanding technique is essential to achieving a refined and professional finish. And around here, we understand the importance of preserving the integrity and elegance of fine furniture. This guide will walk you through the fundamentals of how to sand wood properly—ensuring that every surface you touch is prepared to showcase its full potential.
Why Sanding Matters
Sanding serves two key purposes in the preparation and finishing of wood furniture. First, it removes the thin, uneven top layer of the wood’s surface—often marred by old finish, minor scratches, or rough textures—which allows stains, paints, and sealants to penetrate more deeply and adhere more evenly. Without this crucial step, new finishes are likely to sit atop the wood, vulnerable to peeling, bubbling, or fading over time.
Second, sanding smooths the surface, enhancing the tactile quality of the wood. A well-sanded piece of Chippendale furniture or Louis XVI table edge not only looks pristine but invites touch, without the unwelcome surprise of a splinter or uneven ridge.
Choosing the Right Sandpaper
Before beginning, selecting the proper sandpaper is essential to avoid over-sanding, gouging, or leaving the wood too rough for finishing. Sandpaper is graded by grit—the coarseness of the abrasive material on its surface. The lower the grit number, the coarser the paper.
- Coarse (40–80 grit): Ideal for removing thick paint, heavy varnish, or uneven surfaces, though rarely needed for furniture.
- Medium (100–140 grit): Most suitable for general-purpose sanding. This grit range is appropriate for hardwood surfaces and is commonly used in the early stages of refinishing.
- Fine (150–180 grit): Recommended for softwoods, carvings, or delicate details. Also useful for smoothing after an initial sanding with medium grit.
- Extra Fine (220+ grit): Used between coats of finish or for a final buffing before staining or sealing.
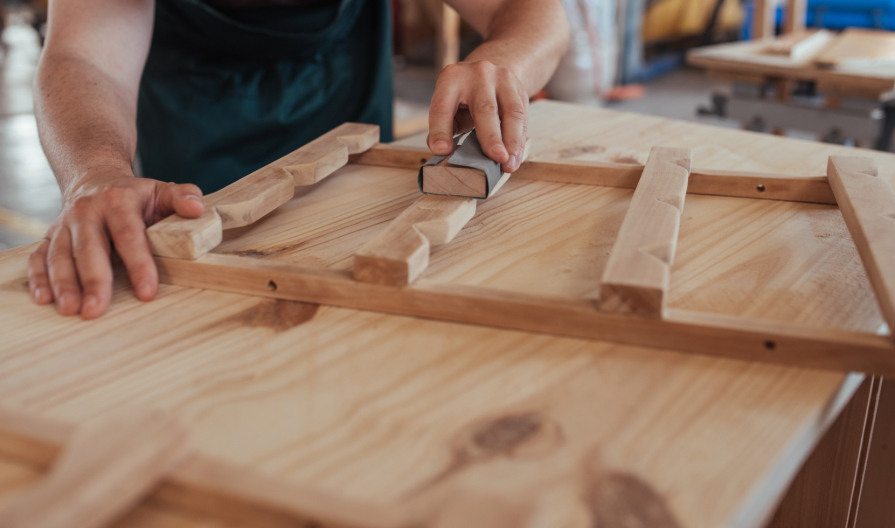
A sanding block—essentially a piece of foam or wood wrapped with sandpaper—offers better control, keeps pressure even, and helps preserve the contours of the piece. For carved or contoured details, flexible foam sanding pads or folded sheets can adapt to intricate shapes without flattening them.
The Proper Sanding Technique
The success of any sanding project lies not only in the tools but in the technique. Follow these steps for a polished result:
- Prepare the Surface: Ensure the furniture is clean and dry. Remove any hardware or components that may interfere with sanding.
- Work with the Grain: Always sand in the direction of the wood grain. Sanding against the grain can result in scratches that become pronounced after staining.
- Apply Even Pressure: Use smooth, controlled strokes. Let the abrasive do the work—pushing too hard can create uneven patches or grooves.
- Step Down in Grit: Begin with medium grit to level the surface and remove blemishes. Follow with fine grit to refine the surface further.
- Address Edges and Curves: Use a sanding block for flat surfaces and switch to hand-held sandpaper for rounded or carved edges. Take care not to over-sand corners, which can alter the design.
- Inspect as You Go: Wipe down the surface periodically to inspect your progress. This helps catch inconsistencies before proceeding to the next grit.
- Clean Thoroughly: Once the surface is smooth to the touch, remove all dust using a tack cloth or vacuum with a soft-brush attachment. Residual sawdust can interfere with stains and finishes.
Craftsmanship Begins with the Finish
Sanding may be one of the more unglamorous steps in woodworking, but its impact is undeniable. A thoughtfully sanded piece enhances both the beauty and longevity of the finish. Whether restoring a family heirloom or preparing a new piece for staining, mastering the art of sanding is fundamental to achieving timeless elegance.
We approach every project with reverence for craftsmanship and the traditions of fine furniture making. We hope this guide supports your pursuit of perfection and preserves the grace of your cherished wood furnishings for years to come.