- Home
- Our Blog
Our Blog
Recent Posts
The Proper Way to Sand Wood
Posted by on
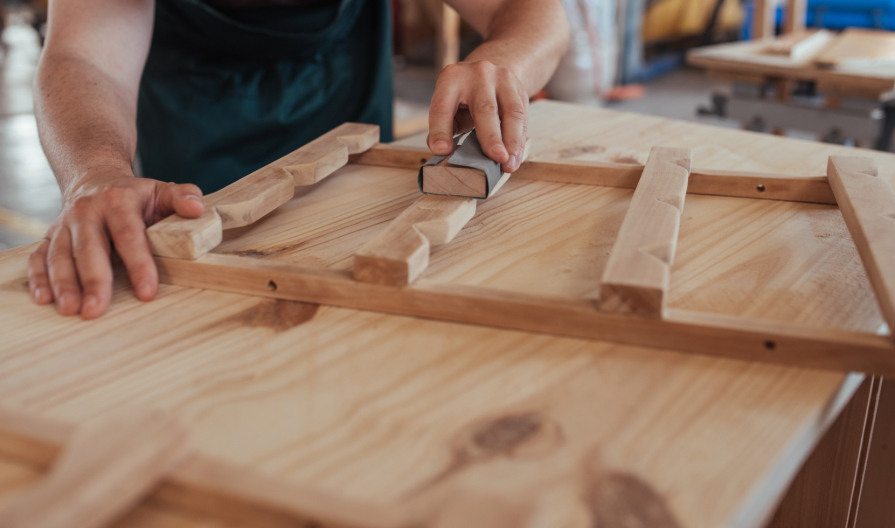
Whether you are restoring a treasured heirloom or crafting a faithful antique reproduction, proper sanding technique is essential to achieving a refined and professional finish. And around here, we understand the importance of preserving the integrity and elegance of fine furniture. This guide will walk you through the fundamentals of how to sand wood properly—ensuring that every surface you touch is prepared to showcase its full potential.
Why Sanding Matters
Sanding serves two key purposes in the preparation and finishing of wood furniture. First, it removes the thin, uneven top layer of the wood’s surface—often marred by old finish, minor scratches, or rough textures—which allows stains, paints, and sealants to penetrate more deeply and adhere more evenly. Without this crucial step, new finishes are likely to sit atop the wood, vulnerable to peeling, bubbling, or fading over time.
Second, sanding smooths the surface, enhancing the tactile quality of the wood. A well-sanded piece of Chippendale furniture or Louis XVI table edge not only looks pristine but invites touch, without the unwelcome surprise of a splinter or uneven ridge.
Choosing the Right Sandpaper
Before beginning, selecting the proper sandpaper is essential to avoid over-sanding, gouging, or leaving the wood too rough for finishing. Sandpaper is graded by grit—the coarseness of the abrasive material on its surface. The lower the grit number, the coarser the paper.
- Coarse (40–80 grit): Ideal for removing thick paint, heavy varnish, or uneven surfaces, though rarely needed for furniture.
- Medium (100–140 grit): Most suitable for general-purpose sanding. This grit range is appropriate for hardwood surfaces and is commonly used in the early stages of refinishing.
- Fine (150–180 grit): Recommended for softwoods, carvings, or delicate details. Also useful for smoothing after an initial sanding with medium grit.
- Extra Fine (220+ grit): Used between coats of finish or for a final buffing before staining or sealing.
A sanding block—essentially a piece of foam or wood wrapped with sandpaper—offers better control, keeps pressure even, and helps preserve the contours of the piece. For carved or contoured details, flexible foam sanding pads or folded sheets can adapt to intricate shapes without flattening them.
The Proper Sanding Technique
The success of any sanding project lies not only in the tools but in the technique. Follow these steps for a polished result:
- Prepare the Surface: Ensure the furniture is clean and dry. Remove any hardware or components that may interfere with sanding.
- Work with the Grain: Always sand in the direction of the wood grain. Sanding against the grain can result in scratches that become pronounced after staining.
- Apply Even Pressure: Use smooth, controlled strokes. Let the abrasive do the work—pushing too hard can create uneven patches or grooves.
- Step Down in Grit: Begin with medium grit to level the surface and remove blemishes. Follow with fine grit to refine the surface further.
- Address Edges and Curves: Use a sanding block for flat surfaces and switch to hand-held sandpaper for rounded or carved edges. Take care not to over-sand corners, which can alter the design.
- Inspect as You Go: Wipe down the surface periodically to inspect your progress. This helps catch inconsistencies before proceeding to the next grit.
- Clean Thoroughly: Once the surface is smooth to the touch, remove all dust using a tack cloth or vacuum with a soft-brush attachment. Residual sawdust can interfere with stains and finishes.
Craftsmanship Begins with the Finish
Sanding may be one of the more unglamorous steps in woodworking, but its impact is undeniable. A thoughtfully sanded piece enhances both the beauty and longevity of the finish. Whether restoring a family heirloom or preparing a new piece for staining, mastering the art of sanding is fundamental to achieving timeless elegance.
We approach every project with reverence for craftsmanship and the traditions of fine furniture making. We hope this guide supports your pursuit of perfection and preserves the grace of your cherished wood furnishings for years to come.
How to Tell If Your Wood Is Insect-Damaged
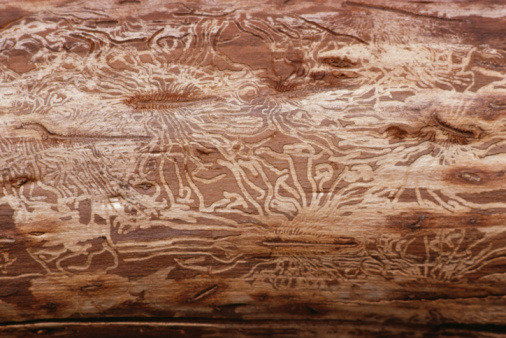
Solid wood furniture is more than a design choice—it is an investment in craftsmanship, longevity, and natural beauty. However, as enduring as hardwood may be, it is not impervious to the subtle, yet destructive forces of nature—specifically, wood-boring insects. Whether you own an antique reproduction or an original Victorian chair, safeguarding your furniture begins with knowledge. [...]
Advice for Antique Furniture Refinishing
Refinishing Your Antique Furniture – Everything You Need to Know In a perfect world, those who love antiques could inherit beautiful pieces of furniture in well-loved but cared-for condition. Things like dents, dings, scrapes, moisture damage, and insect damage would never happen, and the patina on our beloved family heirlooms would always be perfect. Unfortunately, the [...]
Which Mattress Size is Right For You?
Before purchasing a new bed make sure you know what size your current mattress is or what size you would like to have in the future. Below is a chart of the most common sizes for the United States, UK, and Asia. MATTRESS SIZES: CALIFORNIA KING: A mattress that measures 72 inches wide and 84 inches long. EASTERN [...]
How to Care for Solid Wood Furniture
Take the time to learn how to care for your solid wood furniture and it will last for generations. Our hand carved mahogany furniture is created by expert craftsmen, so you only need to do basic maintenance to keep it looking beautiful.Basic Care for Wood Furniture There are some basic precautions you can take to care [...]
The "Solid Wood" Test
If you don't know a lot about furniture construction, what types of joints to look for, what types of woods, or the pros and cons of different finishing techniques, try this simple "solid wood" test to quickly gauge quality: Ask the company what their furniture is made of: If they say that they build with solid hardwoods [...]
Know your Antique Styles: Victorian Furniture
Furniture fit for a Queen... Today's Victorian furniture originates from a period in time when the ever-beloved Queen Victoria reigned England. As one of the few queens in history to marry non-royalty from the middle class, Queen Victoria had a special place in the people's hearts which reflected culturally, all the way down to the style of [...]
Wood Joints—The Good, The Bad, and the Ugly
Good reproduction furniture will not just be nailed or glued together. The type of wood joinery is one of the most important elements in determining a piece of furniture’s quality. Today we'll give some examples of the best-practices and worst-practices in terms of this aspect of woodworking. The Good: The good kinds of joinery employ a method [...]
5 Reasons Why People Love Us
When you buy from Laurel Crown, you’re getting much more than a piece of furniture—you’re getting passionate design, the industry’s highest standards, the backing of true experts dedicated to unwavering service, and a strong commitment to the following guarantees: 1. Our Furniture is Heirloom Quality Relying on hand craftsmanship over the use of [...]
What makes Laurel Crown's craftsmanship different

Our custom wood furniture is hand designed by woodworkers specially trained to create antique reproductions. High quality materials used to hand-make and finish furniture make it distinctive. And, our exclusive line of upholstered living room furniture offers plenty of options for customization, too.Antique Reproduction Furniture Built with the Finest Materials Available We create antique reproduction furniture [...]